우리가 EC2를 모니터링하고자 할 때 기본적으로 제공하는 것은 CPU와 네트워크에 관련된 메트릭 뿐입니다.
이를 해결하기 위해서 aws-cloudwatch-agent를 설치해서 해당 agent가 이 값을 수집해 cloudwatch 서비스로 전송하는 방식으로 모니터링을 진행해야 합니다.
설치 확인
amazon linux 2023 OS로 진행했습니다.
IAM Role 생성
먼저 EC2에서 CloudWatch Agent의 지표를 수집할 수 있게 역할과 정책을 생성해야 합니다.
IAM 역할에서 역할 생성에서 신뢰할 수 있는 엔터티에 EC2 서비스를 선택합니다.

CloudWatchAgentServerPolicy 정책을 추가합니다.

이쁜 이름을 넣어주고 역할 생성 버튼을 클릭합니다.

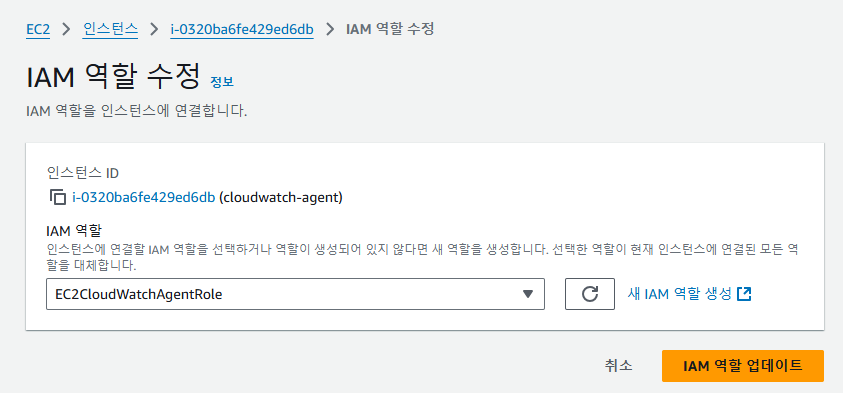
이제 EC2 서비스로 이동합니다.
내가 작업을 원하는 인스턴스를 클릭한 후에 작업 > 보안 > IAM 역할 수정으로 들어갑니다.

아까 만든 역할을 선택하고 IAM 역할 업데이트를 수행합니다.
EC2에 CloudWatch agent 설치
이제 이 매트릭을 수집해줄 cloudwatch-agent를 설치해줘야합니다.
다음 명령어를 통해서 agent를 설치 및 설치 wizard를 실행합니다.
# 해당 명령어를 입력하여 CloudWatch Agent를 설치해 줍니다.
sudo yum install -y amazon-cloudwatch-agent

# Cloudwatch Agent가 설치된 경로로 이동해서 설치된 파일을 실행시켜 줍니다.
cd /opt/aws/amazon-cloudwatch-agent/bin/
sudo ./amazon-cloudwatch-agent-config-wizard
처음 설치하게 되면 환경설정을 물어보는데 다음과 같이 지정하면 됩니다.

만약 설정파일을 바꾸고 싶다면 다시 wizard를 실행하거나 아래 위치에서 파일을 수정하면 됩니다.
vi /opt/aws/amazon-cloudwatch-agent/bin/config.json
에이전트를 실행합니다.
sudo /opt/aws/amazon-cloudwatch-agent/bin/amazon-cloudwatch-agent-ctl -a fetch-config -m ec2 -c file:/opt/aws/amazon-cloudwatch-agent/bin/config.json -s
에이전트 서비스를 확인하려면
systemctl status amazon-cloudwatch-agent.service
AWS CloudWatch -agent ctl 로 명령하기
이렇게 cloudwatch agent ctl도 제공하니 필요한건 여기서 진행해도됩니다.
Invalid action:


        usage:  amazon-cloudwatch-agent-ctl -a
                stop|start|status|fetch-config|append-config|remove-config|set-log-level
                [-m ec2|onPremise|onPrem|auto]
                [-c default|all|ssm:<parameter-store-name>|file:<file-path>]
                [-s]
                [-l INFO|DEBUG|WARN|ERROR|OFF]

        e.g.
        1. apply a SSM parameter store config on EC2 instance and restart the agent afterwards:
            amazon-cloudwatch-agent-ctl -a fetch-config -m ec2 -c ssm:AmazonCloudWatch-Config.json -s
        2. append a local json config file on onPremise host and restart the agent afterwards:
            amazon-cloudwatch-agent-ctl -a append-config -m onPremise -c file:/tmp/config.json -s
        3. query agent status:
            amazon-cloudwatch-agent-ctl -a status

        -a: action
            stop:                                   stop the agent process.
            start:                                  start the agent process.
            status:                                 get the status of the agent process.
            fetch-config:                           apply config for agent, followed by -c. Target config can be based on location (ssm parameter store name, file name), or 'default'.
            append-config:                          append json config with the existing json configs if any, followed by -c. Target config can be based on the location (ssm parameter store name, file name), or 'default'.
            remove-config:                          remove config for agent, followed by -c. Target config can be based on the location (ssm parameter store name, file name), or 'all'.
            set-log-level:                          sets the log level, followed by -l to provide the level in all caps.

        -m: mode
            ec2:                                    indicate this is on ec2 host.
            onPremise, onPrem:                      indicate this is on onPremise host.
            auto:                                   use ec2 metadata to determine the environment, may not be accurate if ec2 metadata is not available for some reason on EC2.

        -c: amazon-cloudwatch-agent configuration
            default:                                default configuration for quick trial.
            ssm:<parameter-store-name>:             ssm parameter store name.
            file:<file-path>:                       file path on the host.
            all:                                    all existing configs. Only apply to remove-config action.

        -s: optionally restart after configuring the agent configuration
            this parameter is used for 'fetch-config', 'append-config', 'remove-config' action only.

        -l: log level to set the agent to INFO, DEBUG, WARN, ERROR, or OFF
            this parameter is used for 'set-log-level' only.
요즘에는 심지어 Cloudwatch 에이전트 구성 버튼이 생겨서 이걸 이용하면 더 편리합니다.
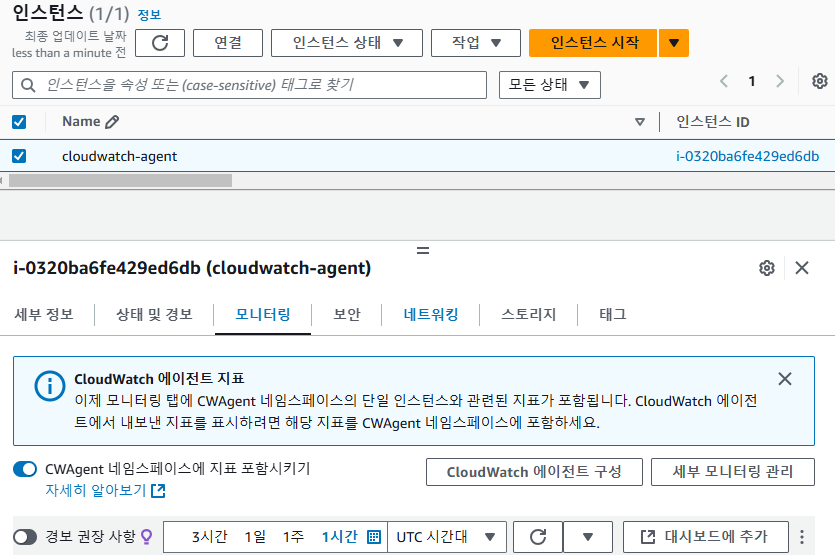
이렇게 지표 선택도 UI에서 쉽게 커스텀할 수 있게 되어있더라구요.

cloudwatch 확인
이제 메트릭이 잘 전송되었는지 cloudwatch 대시보드로 이동해 보겠습니다.
Cloudwatch 서비스로 들어간 후 지표 > 모든 지표를 클릭하시면 CWAgent 항목이 보입니다.
